
F.G.S: Difference between revisions
From Fen Spinner Wiki
More actions
Resolve tutorial review; validate against source and supplied photos; cite tutorial heading |
|||
| (One intermediate revision by the same user not shown) | |||
| Line 8: | Line 8: | ||
|cog= cop | |cog= cop | ||
}} | }} | ||
The '''F.G.S''' is a single sided mod made by Joey. Its name stands for "Frixion. G2. Signo". This mod was | The '''F.G.S''' is a single sided mod made by Joey. Its name stands for "Frixion. G2. Signo". This mod was designed to make the most of every part used. | ||
==Construction== | ==Construction== | ||
===Parts needed=== | ===Parts needed=== | ||
List from the Taco's post <ref name=Tutorial">https://hackmd.io/r-5MVBUjSESILF7l2mkNDw?view</ref>: | List from the Taco's post <ref name="Tutorial">https://hackmd.io/r-5MVBUjSESILF7l2mkNDw?view</ref>: | ||
* x1 [[Pilot G2]] (Everything) | * x1 [[Pilot G2]] (Everything) | ||
* x1 [[Pilot Frixion Colors]] (Everything except white barrel) | * x1 [[Pilot Frixion Colors]] (Everything except white barrel) | ||
| Line 22: | Line 22: | ||
* Tape | * Tape | ||
===Text tutorial=== | ===Text tutorial<ref>[https://hackmd.io/r-5MVBUjSESILF7l2mkNDw?view Joey’s F.G.S tutorial], photographs by Joey.</ref>=== | ||
== | # Prepare two inserts: 9.6 × 2.5 cm for the Signo DX barrel and 3 × 2.7 cm for the front sleeve. Part of the longer insert will be hidden.<br>[[File:FGSTutorial02.jpg|left|thumb|200px]]<br clear=all> | ||
# Cut the | # Disassemble the Signo DX, retaining its barrel, tip, grip, backplug and refill parts.<br>[[File:FGSTutorial03.jpg|left|thumb|200px]]<br clear=all> | ||
# Cut | # Cut the dome off the Signo DX backplug, keeping its tubular section. Cut off and retain the threaded front of the barrel. Use a saw rather than a tool that squeezes the brittle barrel.<br>[[File:FGSTutorial04.jpg|left|thumb|200px]]<br clear=all> | ||
# Cut a 3 cm section from the threaded end of the rear G2 barrel. Sand the Signo DX front until this sleeve fits over it with the short insert underneath.<br>[[File:FGSTutorial05.jpg|left|thumb|200px]]<br clear=all><br>[[File:FGSTutorial06.jpg|left|thumb|200px]]<br clear=all> | |||
# | # Fit the long insert inside the Signo DX barrel, wrap the short insert around its front, and fit the prepared G2 sleeve.<br>[[File:FGSTutorial07.jpg|left|thumb|200px]]<br clear=all><br>[[File:FGSTutorial08.jpg|left|thumb|200px]]<br clear=all> | ||
# | # Empty and disassemble the Signo DX and G2 refills, retaining their metal nibs and plastic parts.<br>[[File:FGSTutorial09.jpg|left|thumb|200px]]<br clear=all><br>[[File:FGSTutorial10.jpg|left|thumb|200px]]<br clear=all> | ||
# | # Sand the cut Signo DX threaded front and the raised sections of the G2 front barrel as pictured.<br>[[File:FGSTutorial11.jpg|left|thumb|200px]]<br clear=all> | ||
# Cut the G2 front barrel to 2.5 cm, measured from its threaded end.<br>[[File:FGSTutorial12.jpg|left|thumb|200px]]<br clear=all> | |||
# Cut 1.7–1.75 cm from the rear end of the clear Signo DX refill tube and 2.4 cm from the rear end of the G2 refill tube. Prepare the tubes and nib parts as pictured; keep the G2 tube stopper.<br>[[File:FGSTutorial13.jpg|left|thumb|200px]]<br clear=all> | |||
# Cut the | # Tape the Signo DX refill front part until it fits securely inside the G2 tube. Assemble as pictured, add tape around the G2 tube to fit the prepared G2 front barrel, and screw the Signo DX tip onto its retained threaded section.<br>[[File:FGSTutorial14.jpg|left|thumb|200px]]<br clear=all><br>[[File:FGSTutorial15.jpg|left|thumb|200px]]<br clear=all> | ||
# Cut the | # Fit the cut Signo DX backplug over the exposed G2 nib part, with its cut end facing the metal tip. Keep its original orientation for insertion into the barrel.<br>[[File:FGSTutorial16.jpg|left|thumb|200px]]<br clear=all> | ||
# Insert this front assembly into the Signo DX barrel.<br>[[File:FGSTutorial17.jpg|left|thumb|200px]]<br clear=all> | |||
# | # Prepare the smooth G2 grip section, G2 clicker, spring and remaining refill parts, plus the Frixion Colors pen.<br>[[File:FGSTutorial18.jpg|left|thumb|200px]]<br clear=all> | ||
# | # Disassemble the Frixion Colors cap and front assembly. Keep its rubber eraser piece, internal plastic piece and front plug.<br>[[File:FGSTutorial19.jpg|left|thumb|200px]]<br clear=all> | ||
# | # File the raised edge of the Frixion Colors front plug.<br>[[File:FGSTutorial20.jpg|left|thumb|200px]]<br clear=all> | ||
# | # Cut the Frixion Colors front plug to 2.55 cm from the side that originally joined its barrel. Fit the internal plastic piece over the narrow front and cut off the front as pictured.<br>[[File:FGSTutorial21.jpg|left|thumb|200px]]<br clear=all> | ||
# | # Remove the obstruction from the Frixion Colors cap and insert the remaining G2 refill tube.<br>[[File:FGSTutorial22.jpg|left|thumb|200px]]<br clear=all> | ||
# | # Trim that tube flush with the cap opening and fit its stopper into it.<br>[[File:FGSTutorial23.jpg|left|thumb|200px]]<br clear=all> | ||
# Trim the G2 clicker as shown in the ruler photograph.<br>[[File:FGSTutorial24.jpg|left|thumb|200px]]<br clear=all> | |||
# Insert the prepared clicker into the cap in the pictured orientation.<br>[[File:FGSTutorial25.jpg|left|thumb|200px]]<br clear=all> | |||
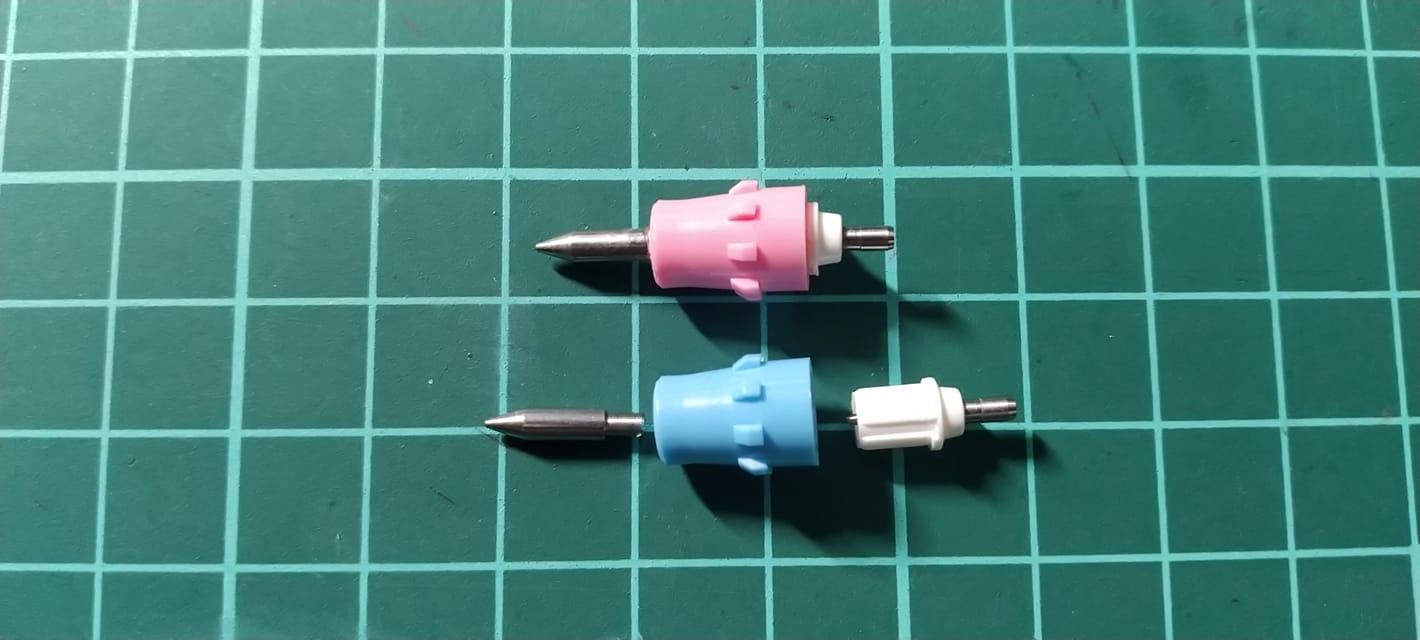
# Pierce the Frixion Colors internal plastic piece. Assemble, from left to right in the photograph: G2 metal nib, pierced plastic piece, Frixion Colors plastic nib, then Signo DX metal nib. Use glue if the fit is loose.<br>[[File:FGSTutorial26.jpg|left|thumb|200px]]<br clear=all> | |||
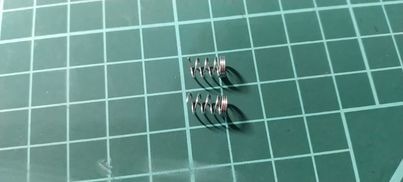
# | # Cut the G2 spring in half.<br>[[File:FGSTutorial27.jpg|left|thumb|200px]]<br clear=all> | ||
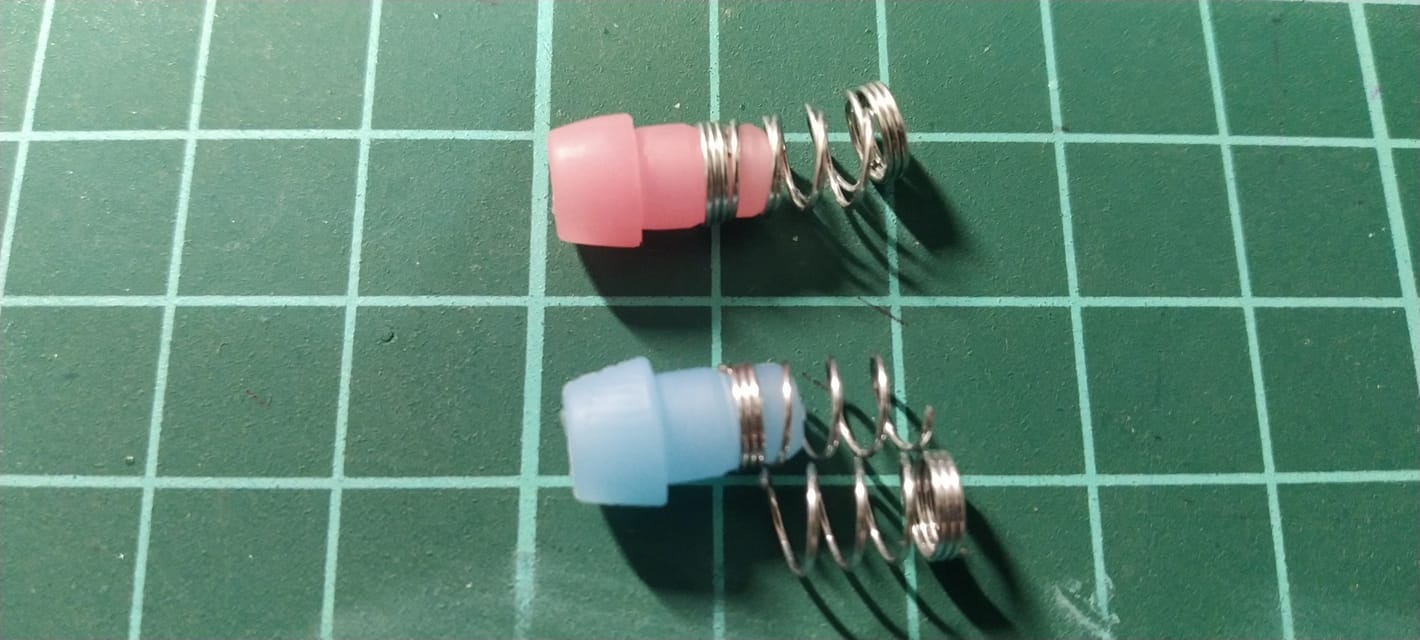
# Fit one spring half onto the Frixion Colors rubber piece, then twist the other half into the first, as shown by the blue and pink examples.<br>[[File:FGSTutorial28.jpg|left|thumb|200px]]<br clear=all> | |||
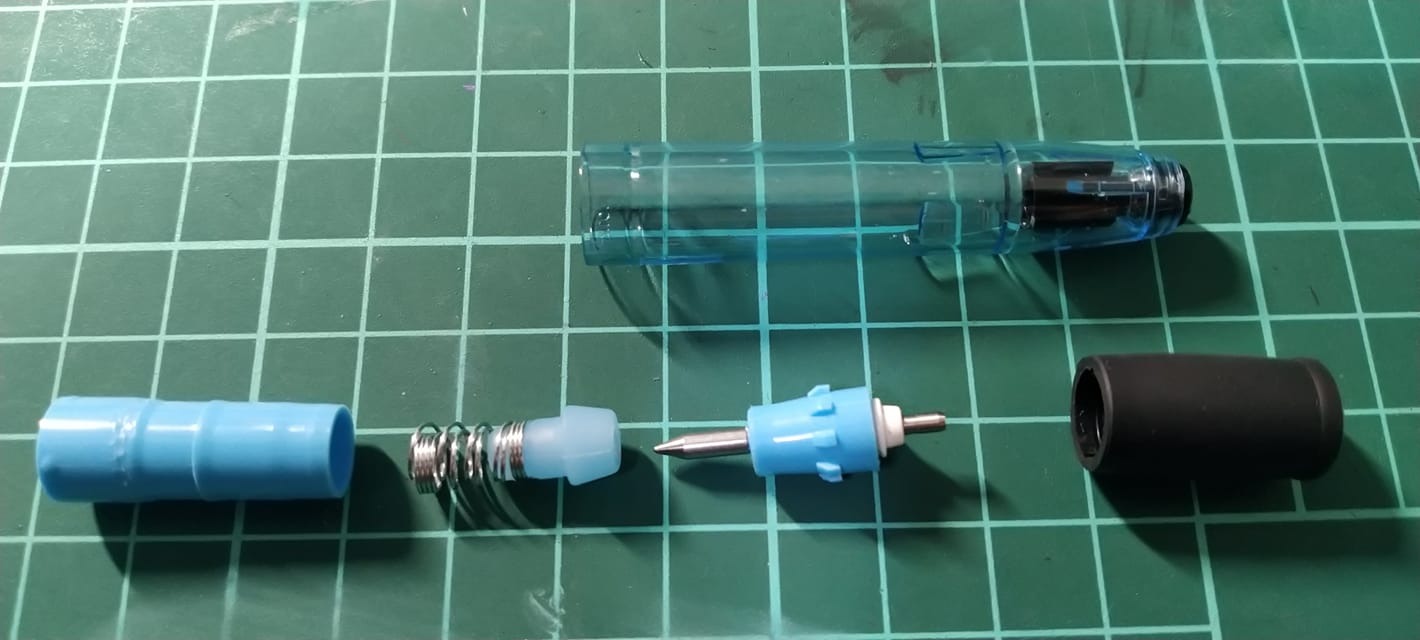
# Assemble the prepared front-plug section, rubber piece with nested springs, and nib assembly in the pictured order inside the cap. Fit the smooth G2 grip section over the cap.<br>[[File:FGSTutorial29.jpg|left|thumb|200px]]<br clear=all><br>[[File:FGSTutorial30.jpg|left|thumb|200px]]<br clear=all> | |||
# | # Attach the cap to the barrel. Fit the ribbed G2 grip section and Signo DX grip over the front, arranging the decorative grips to taste.<br>[[File:FGSTutorial31.jpg|left|thumb|200px]]<br clear=all> | ||
# Check the completed assembly.<br>[[File:FGSTutorial01.jpg|left|thumb|200px]]<br clear=all> | |||
# | |||
# | |||
# | |||
# | |||
# | |||
# Assemble | |||
# | |||
# | |||
==References== | ==References== | ||
<references /> | |||
[[Category:Pen Mods]] | [[Category:Pen Mods]] | ||
Latest revision as of 15:37, 3 October 2026
The F.G.S is a single sided mod made by Joey. Its name stands for "Frixion. G2. Signo". This mod was designed to make the most of every part used.
Construction
Parts needed
List from the Taco's post [1]:
- x1 Pilot G2 (Everything)
- x1 Pilot Frixion Colors (Everything except white barrel)
- x1 Signo DX (Everything except cap)
Additional Items
- 2 inserts (9.6cm x 2.5cm and 3cm x 2.7cm)
- Tape
Text tutorial[2]
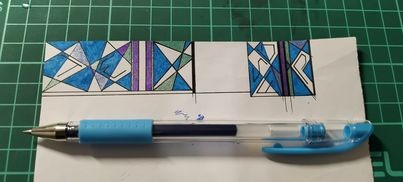
- Prepare two inserts: 9.6 × 2.5 cm for the Signo DX barrel and 3 × 2.7 cm for the front sleeve. Part of the longer insert will be hidden.
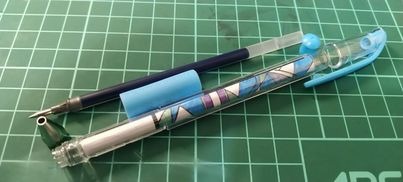
- Disassemble the Signo DX, retaining its barrel, tip, grip, backplug and refill parts.
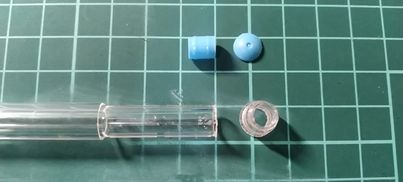
- Cut the dome off the Signo DX backplug, keeping its tubular section. Cut off and retain the threaded front of the barrel. Use a saw rather than a tool that squeezes the brittle barrel.
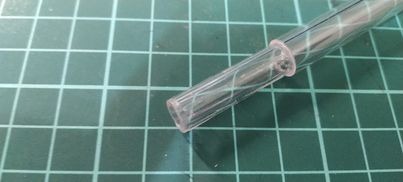
- Cut a 3 cm section from the threaded end of the rear G2 barrel. Sand the Signo DX front until this sleeve fits over it with the short insert underneath.
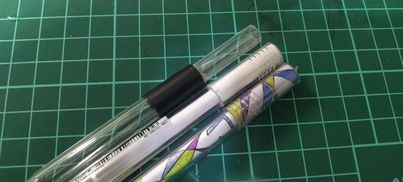
- Fit the long insert inside the Signo DX barrel, wrap the short insert around its front, and fit the prepared G2 sleeve.
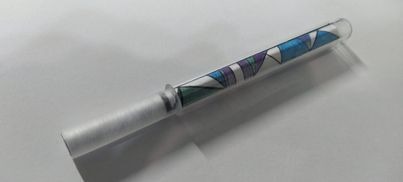
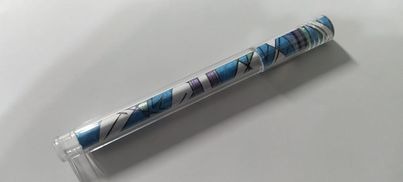
- Empty and disassemble the Signo DX and G2 refills, retaining their metal nibs and plastic parts.
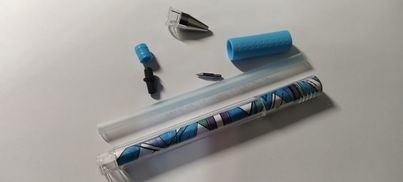
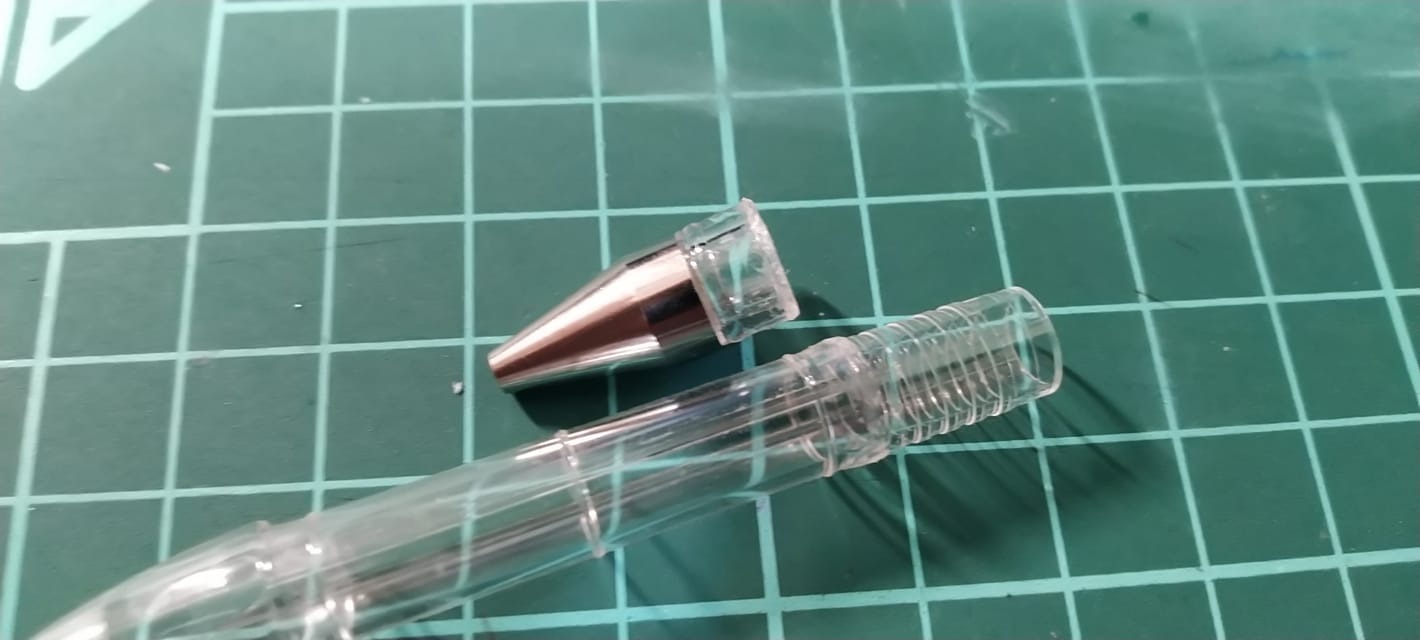
- Sand the cut Signo DX threaded front and the raised sections of the G2 front barrel as pictured.
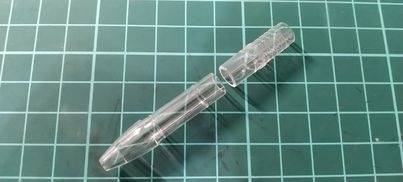
- Cut the G2 front barrel to 2.5 cm, measured from its threaded end.
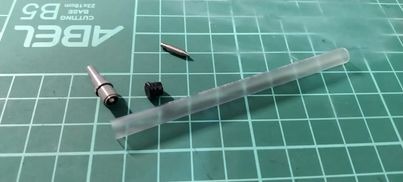
- Cut 1.7–1.75 cm from the rear end of the clear Signo DX refill tube and 2.4 cm from the rear end of the G2 refill tube. Prepare the tubes and nib parts as pictured; keep the G2 tube stopper.
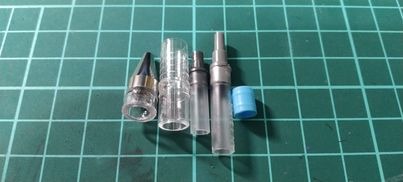
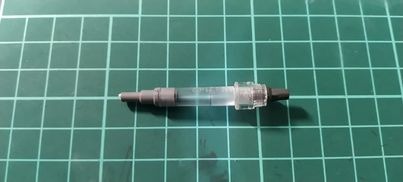
- Tape the Signo DX refill front part until it fits securely inside the G2 tube. Assemble as pictured, add tape around the G2 tube to fit the prepared G2 front barrel, and screw the Signo DX tip onto its retained threaded section.
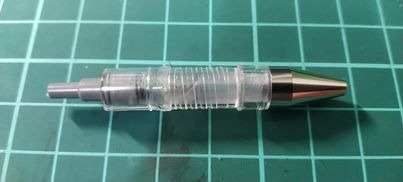
- Fit the cut Signo DX backplug over the exposed G2 nib part, with its cut end facing the metal tip. Keep its original orientation for insertion into the barrel.
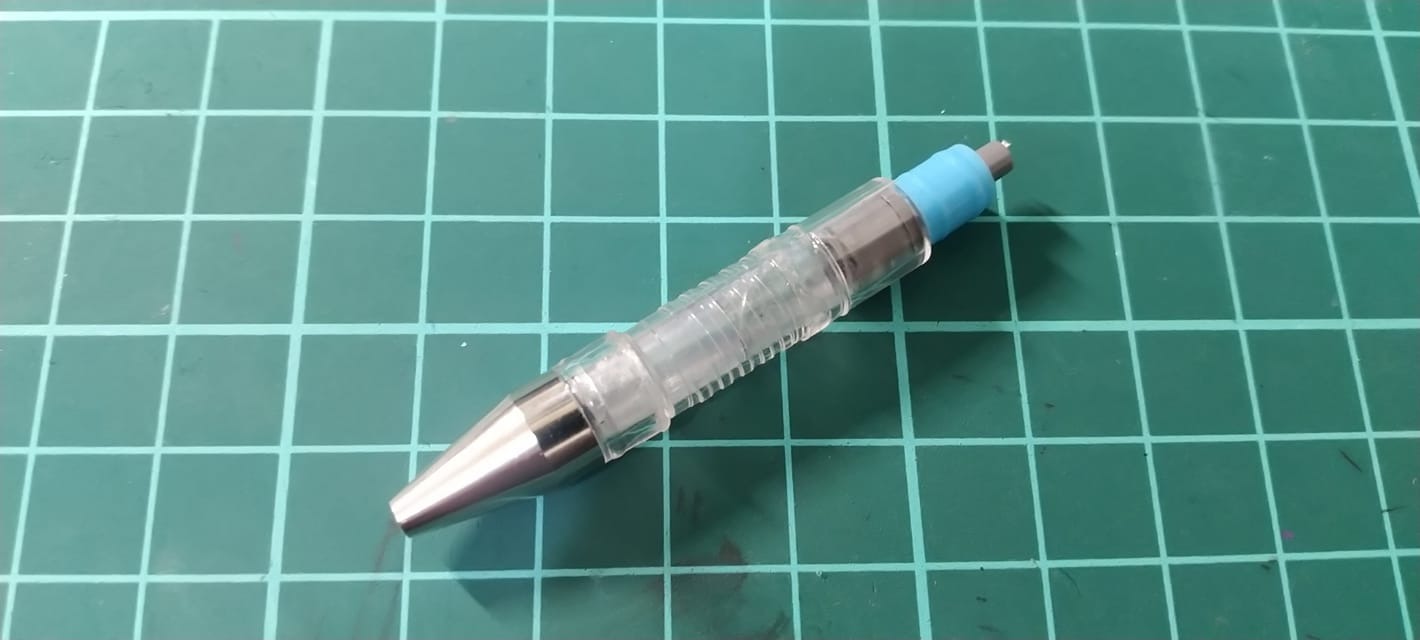
- Insert this front assembly into the Signo DX barrel.
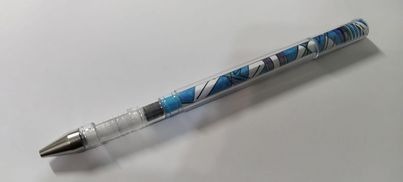
- Prepare the smooth G2 grip section, G2 clicker, spring and remaining refill parts, plus the Frixion Colors pen.
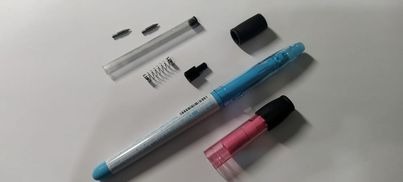
- Disassemble the Frixion Colors cap and front assembly. Keep its rubber eraser piece, internal plastic piece and front plug.
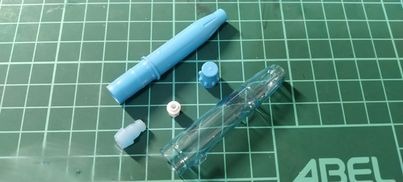
- File the raised edge of the Frixion Colors front plug.
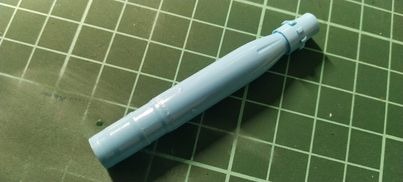
- Cut the Frixion Colors front plug to 2.55 cm from the side that originally joined its barrel. Fit the internal plastic piece over the narrow front and cut off the front as pictured.
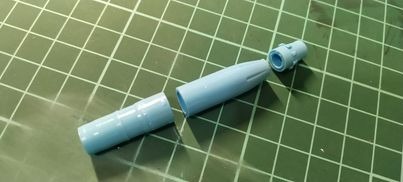
- Remove the obstruction from the Frixion Colors cap and insert the remaining G2 refill tube.
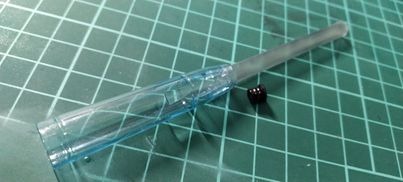
- Trim that tube flush with the cap opening and fit its stopper into it.
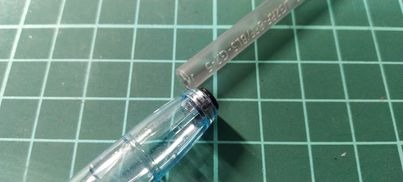
- Trim the G2 clicker as shown in the ruler photograph.
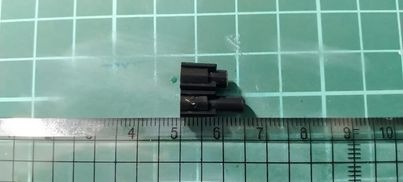
- Insert the prepared clicker into the cap in the pictured orientation.
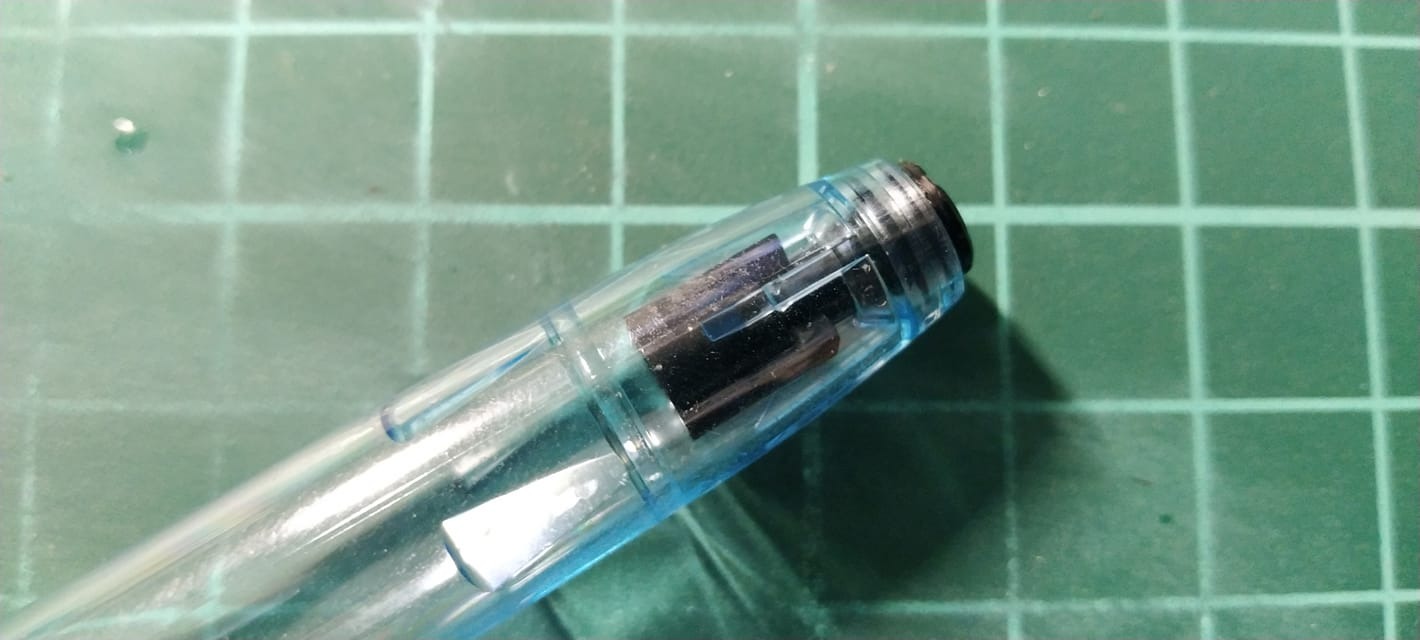
- Pierce the Frixion Colors internal plastic piece. Assemble, from left to right in the photograph: G2 metal nib, pierced plastic piece, Frixion Colors plastic nib, then Signo DX metal nib. Use glue if the fit is loose.
- Cut the G2 spring in half.
- Fit one spring half onto the Frixion Colors rubber piece, then twist the other half into the first, as shown by the blue and pink examples.
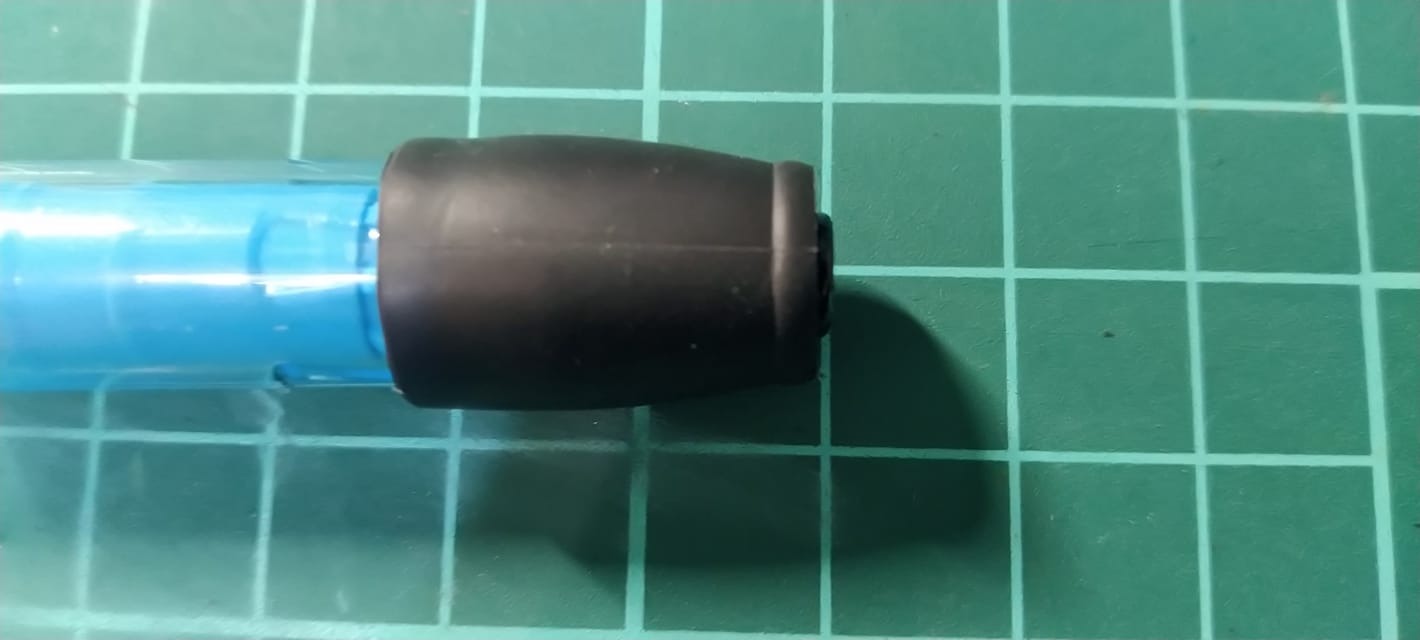
- Assemble the prepared front-plug section, rubber piece with nested springs, and nib assembly in the pictured order inside the cap. Fit the smooth G2 grip section over the cap.
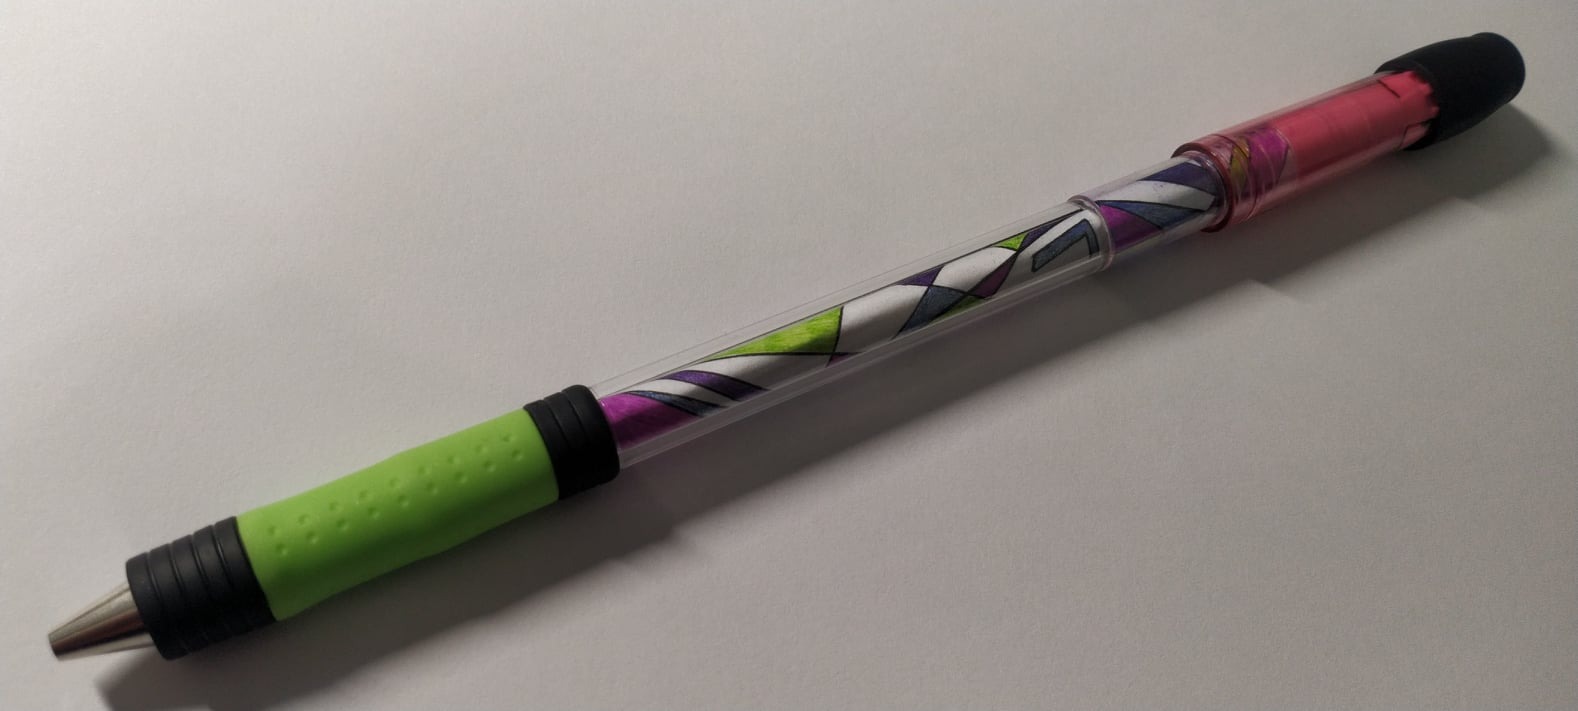
- Attach the cap to the barrel. Fit the ribbed G2 grip section and Signo DX grip over the front, arranging the decorative grips to taste.
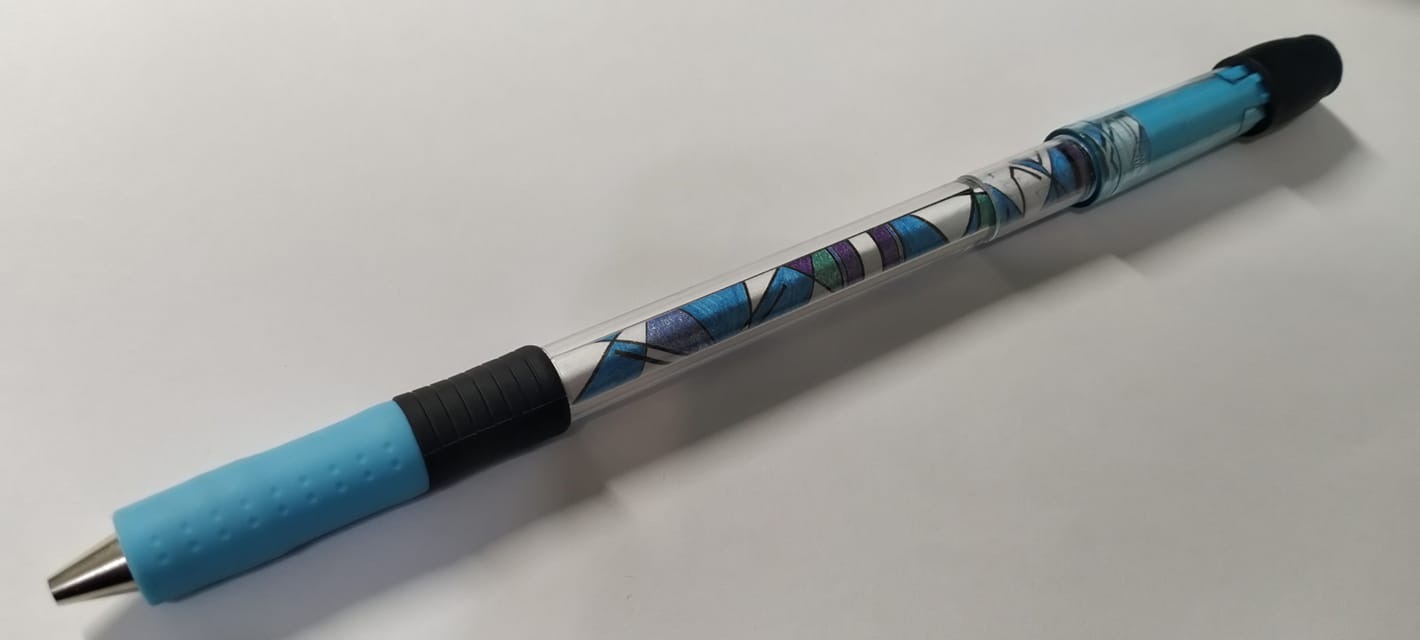
- Check the completed assembly.


References
- ↑ https://hackmd.io/r-5MVBUjSESILF7l2mkNDw?view
- ↑ Joey’s F.G.S tutorial, photographs by Joey.