
Paper Mod: Difference between revisions
From Fen Spinner Wiki
More actions
paper mod, check for mistakes |
Validate text tutorial against recovered source; clarify construction and add heading reference and sourced images |
||
| (9 intermediate revisions by 3 users not shown) | |||
| Line 5: | Line 5: | ||
|style= [[Double Sided]] | |style= [[Double Sided]] | ||
|length= 20-24cm | |length= 20-24cm | ||
|weight= 10- | |weight= 10-30g+, weight depends on the screws | ||
|cog= | |cog=COP | ||
}} | }} | ||
The '''Paper Mod''' is a personal mod made by [[UPSB]] spinner [[I.suk]]. It is known for its simple construction and the visual variety it can offer. | The '''Paper Mod''' is a personal mod made by [[UPSB]] spinner [[I.suk]]. It is known for its simple construction and the visual variety it can offer. | ||
It is commonly recommended to beginners as the parts can be found anywhere. | |||
==Construction== | ==Construction== | ||
===Parts needed=== | ===Parts needed=== | ||
List from [[I.suk]]'s YouTube | List from [[I.suk]]'s YouTube channel:<ref name="I.suk">https://youtu.be/y4jfJjyySQc</ref> | ||
* Adhesive contact for covering books (or wrapping paper) | * Adhesive contact for covering books (or wrapping paper) | ||
* 2 Screws | * 2 Screws | ||
| Line 19: | Line 21: | ||
* (Double sided tape, clear, tape, black electrical tape) | * (Double sided tape, clear, tape, black electrical tape) | ||
===Text tutorial=== | ===Text tutorial<ref>[https://www.youtube.com/watch?v=y4jfJjyySQc Paper Mod tutorial]</ref>=== | ||
# Cut | # Cut a 16 × 16 cm paper square. Apply double-sided tape and roll it tightly into the central core.<br>[[File:Papermod1.JPG|left|thumb|200px]]<br clear=all><br>[[File:Papermod2.JPG|left|thumb|200px]]<br clear=all> | ||
# Cut a second paper piece to 23 × 21 cm.<br>[[File:Papermod3.JPG|left|thumb|200px]]<br clear=all> | |||
# Cut | # Place a screw at each end of the 16 cm core so that the combined length is 23 cm, with 3.5 cm beyond the core at each end. Wrap double-sided tape or adhesive putty around the screw threads to secure them.<br>[[File:Papermod5.JPG|left|thumb|200px]]<br clear=all> | ||
# | # Apply double-sided tape to the second paper piece and roll it tightly around the core and screws.<br>[[File:Papermod4.JPG|left|thumb|200px]]<br clear=all> | ||
# | # Roll the remainder of the sheet from which the 16 cm square was cut around this assembly.<br>[[File:Papermod6.JPG|left|thumb|200px]]<br clear=all> | ||
# | # Tape the edge of the roll and the screw ends securely.<br>[[File:Papermod7.JPG|left|thumb|200px]]<br clear=all> | ||
# | # Wrap electrical tape around both ends and add adhesive covering film, wrapping paper, or a printed outsert. Add more end tape if desired.<br>[[File:Papermod8.JPG|left|thumb|200px]]<br clear=all> | ||
# Wrap | |||
===Video tutorial=== | ===Video tutorial=== | ||
<youtube>https://youtu.be/y4jfJjyySQc</youtube> | <youtube>https://youtu.be/y4jfJjyySQc</youtube> | ||
Video tutorial by | Video tutorial by [[I.suk]]. | ||
==References== | ==References== | ||
<references /> | <references /> | ||
[[Category: Pen Mods]] | [[Category: Pen Mods]] | ||
Latest revision as of 21:49, 2 October 2026
The Paper Mod is a personal mod made by UPSB spinner I.suk. It is known for its simple construction and the visual variety it can offer.
It is commonly recommended to beginners as the parts can be found anywhere.
Construction
Parts needed
List from I.suk's YouTube channel:[1]
- Adhesive contact for covering books (or wrapping paper)
- 2 Screws
- 2-3 sheets A4 paper
- (Double sided tape, clear, tape, black electrical tape)
Text tutorial[2]
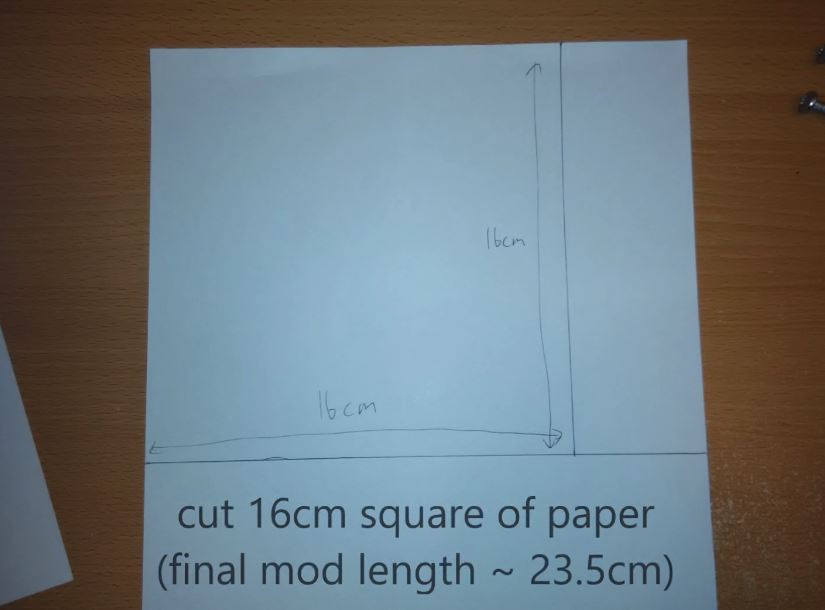
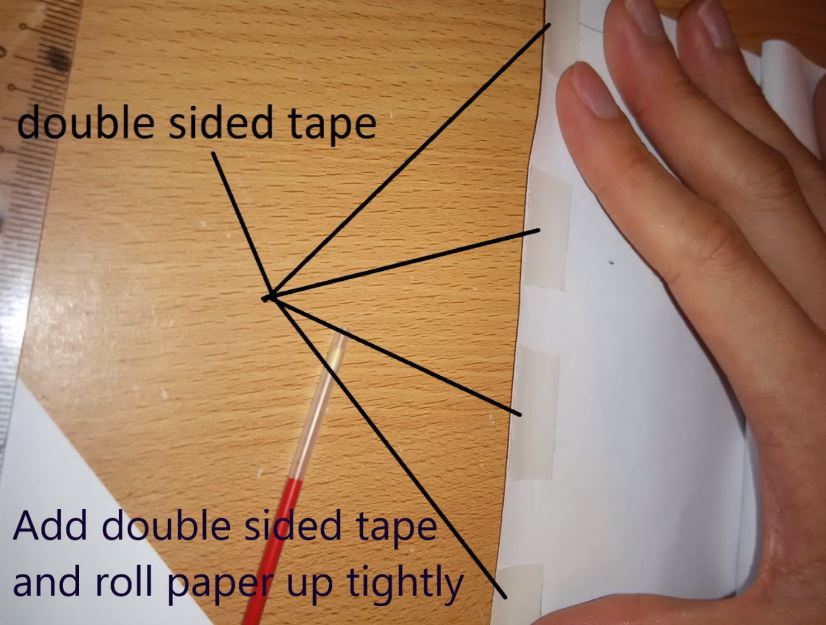
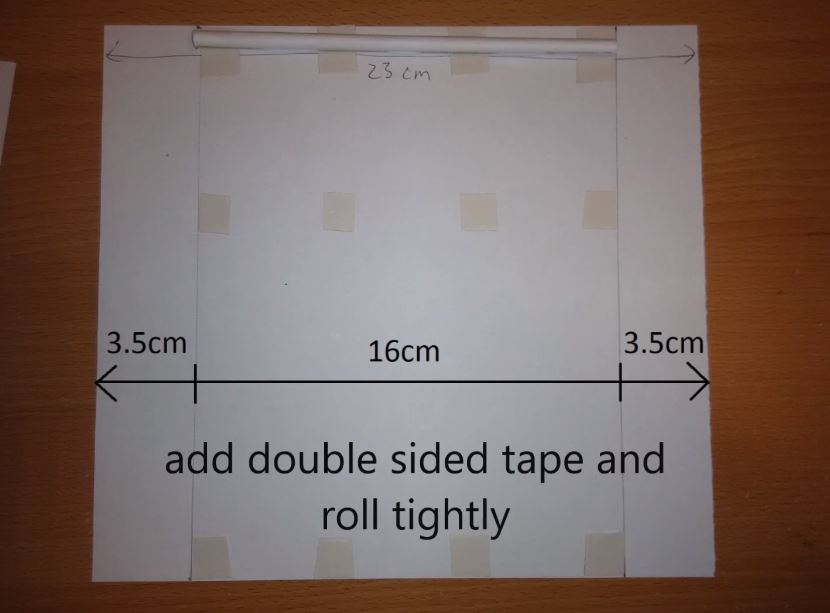
- Cut a 16 × 16 cm paper square. Apply double-sided tape and roll it tightly into the central core.
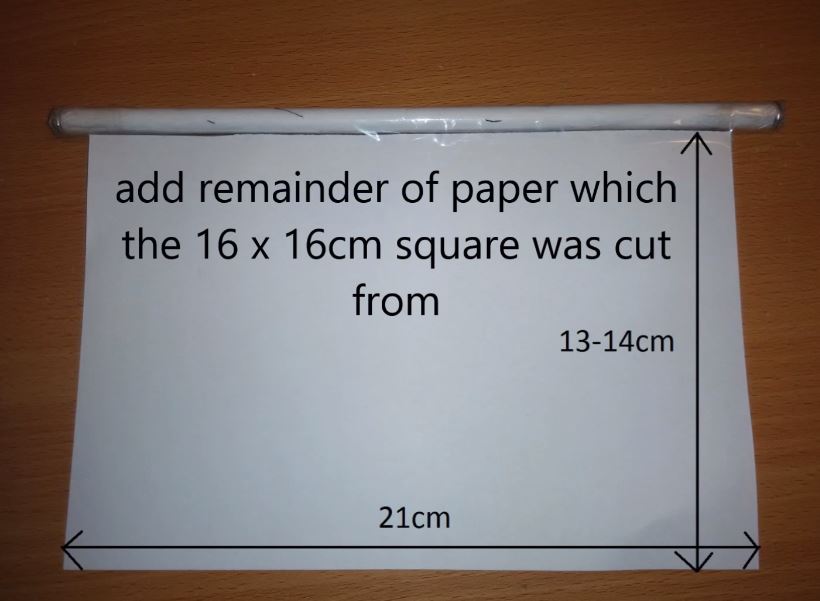
- Cut a second paper piece to 23 × 21 cm.
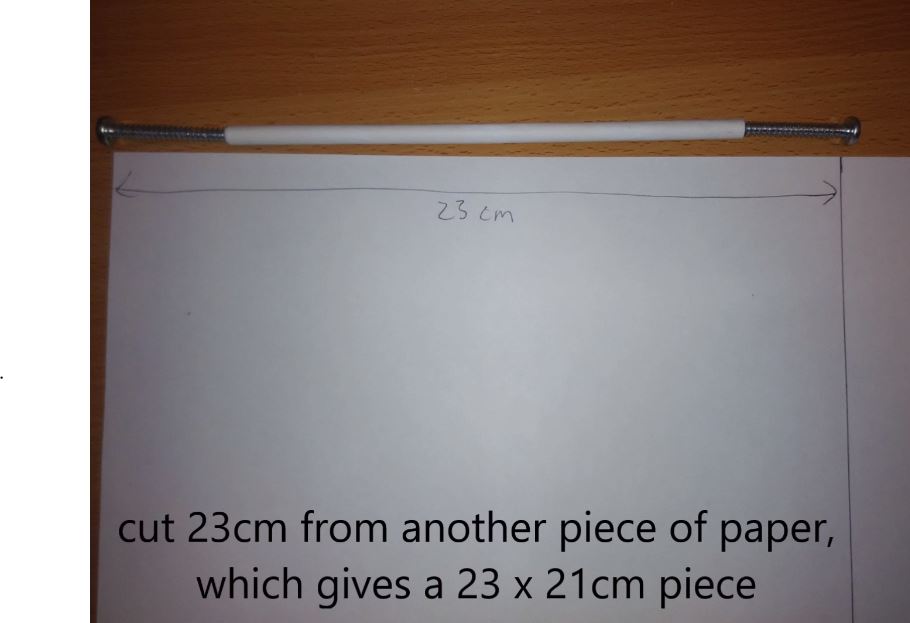
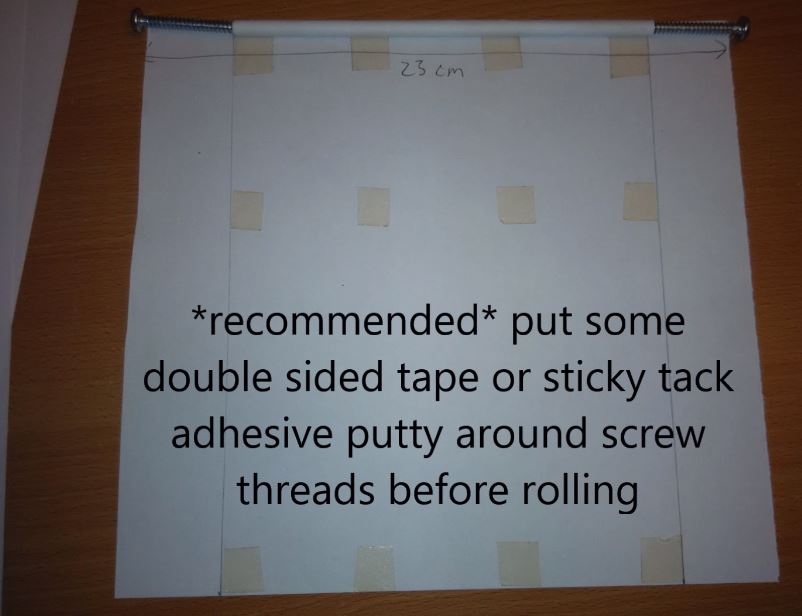
- Place a screw at each end of the 16 cm core so that the combined length is 23 cm, with 3.5 cm beyond the core at each end. Wrap double-sided tape or adhesive putty around the screw threads to secure them.
- Apply double-sided tape to the second paper piece and roll it tightly around the core and screws.
- Roll the remainder of the sheet from which the 16 cm square was cut around this assembly.
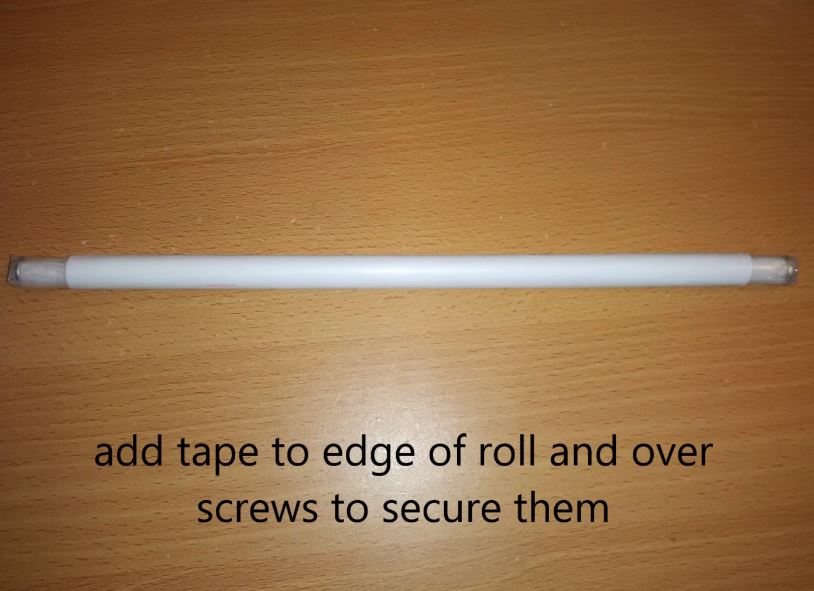
- Tape the edge of the roll and the screw ends securely.
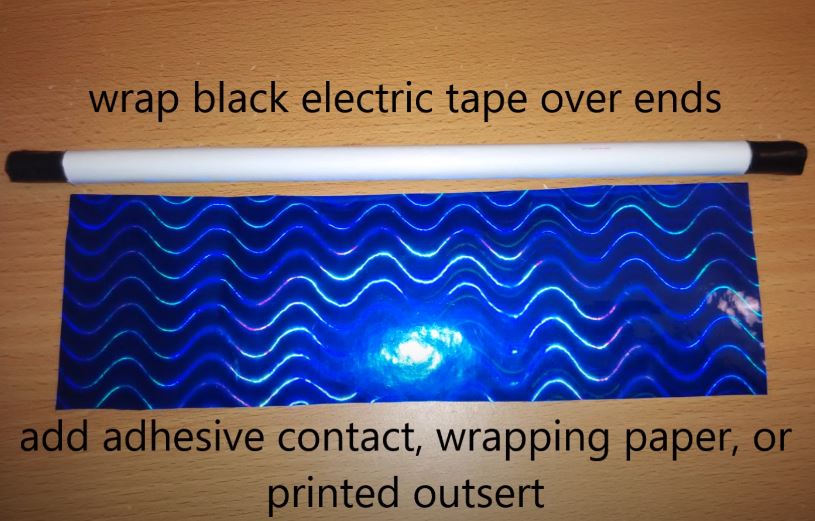
- Wrap electrical tape around both ends and add adhesive covering film, wrapping paper, or a printed outsert. Add more end tape if desired.


Video tutorial
Video tutorial by I.suk.